I'm participating in a fun holiday giveaway with some of my friends and I'd love for you to win!
All you have to do to enter is just click on the Rafflecopter below. Merry Christmas!
LINKS TO TPT SHOPS:
1. Nicole Roberts Shelby - http://www.teacherspayteachers.com/Store/Nicole-Shelby
2. Molly Maloy - http://www.teacherspayteachers.com/Store/Molly-Maloy
3. Christina Bainbridge - http://www.teacherspayteachers.com/Sto…/Christina-Bainbridge
4. Zip-A-Dee-Doo-Dah Designs - http://www.teacherspayteachers.com/Store/Zip-a-dee-doo-dah-Designs
a Rafflecopter giveaway
Friday, December 5, 2014
Sunday, November 30, 2014
Save Yourself Some Merry Little Minutes
with you some tips and ideas for saving yourself some "merry little minutes" during the holiday season.
My Time-Consuming Obstacle: The EVIL Copy Machine
How many of you out there can relate? If you are like me, you spend a lot of time at the copy machine. Whoa....if I could have a penny for every minute that I have spent at a copy machine, I would be a millionaire several times over. Not to mention, the amount of time I have spent trying to repair that dreaded "paper jam" that CAN NEVER be located. The copy machines at my school have it out for me, I am sure of it! I have found a way to drastically decrease my interaction with the copy machines, which in turn has saved me time and lowered my blood pressure. :)
ANSWER: Sheet Protectors
I think that I should probably buy stock in sheet protectors. This isn't anything new, but this tip has definitely saved me lots of time and something I wanted to share! Let me explain how sheet protectors have drastically "saved me some merry little minutes." I have multiple sheets that I use daily during instruction or in my centers. I don't want to have make copies of those sheets over and over again. So, my simple solution....put them in sheet protectors. Here are a few ways that I use sheet protectors to not only save time, but the precious paper supply as well.
How I Use Sheet Protectors To Save Time
Idea One:
One activity that I use as a bell ringer is a Daily Review. The review sheet has tasks that the students are to complete each day with a passage. I don't want to have to make copies of those response questions week after week So, I have placed the questions in sheet protectors and just change out the passages each week. This has saved me an abundance of time! The sheets are placed in my baskets at each table and they are always ready to go!
Idea Two:
I have several "staple" graphic organizers that students use in centers or as a way to respond to text. These graphic organizers, such as a Venn diagram, are used often and over and over again. So, to eliminate the worry of having to copy these and having them on hand, I just placed these in page protectors. They are readily available for students to use. Students use dry erase markers to write on these. Once they are finished, the writing can easily be wiped off with a tissue. Then, they are ready to go again! Easy peasy for me and the kids love writing on them! It's a win-win!
Many of the graphic organizers that I use on a daily basis are found in this pack from my store.
Please visit my other blogging friends to learn more tips to SAVE YOURSELF SOME MERRY LITTLE MINUTES this holiday season!
Tuesday, November 25, 2014
Need Some TpT Cash??
We are so excited for the holiday season that we couldn't help but spread some love! Lots of your favorite TPT Teacher-Authors and I have teamed up to give YOU some TPT spending money. We love you and appreciate you (and we wish we could give all of our fabulous followers some money)!
Enter the Rafflecopter below by simply following our TPT stores, and you will have a chance to win one of five $25 TPT gift cards! Good luck!
a Rafflecopter giveaway
I hope you have a wonderful Thanksgiving!
Saturday, September 20, 2014
Main Idea Learning Stations
This week, we continued to practice identifying the main idea and supporting details of nonfiction texts using learning stations. As I mentioned last week, I was going to blog about what we did, so here it is.
I had five learning stations for identifying main idea and supporting details that the students completed. The students completed the learning stations in whatever order they wanted to allow for students to have a little choice. These learning stations took several days to complete, so they worked at their own pace with a partner.
One station that the students completed was a Main Idea- Jungle Safari Game that I purchased from Edupress. I have several of these games and the kids love them!
Another learning station that the kids really liked was the Main Idea in a Bag station from The Brown Bag Teacher. The kids loved these because they incorporated interesting Science and Social Studies topics. There are ten different bags for the students to choose from, but I only required the students to complete graphic organizers for four of the bags. This gave the students opportunities to choose the topics that interested them.
Of course, these stations would never be complete without task cards. There were actually two learning stations that consisted of task cards. I used Rachel Lynette's Main Idea and Supporting Details task cards. I love these because Rachel offers the QR codes with answers for these. The kids used a QR code app for the i-Pad to get immediate feedback without me having to grade anything. This makes them easy-peasy!
The other set of practice cards that the kids used were from Edupress. I actually did this station with each student individually. The students chose four task cards and read each one orally for me. This gave me the opportunity to assess the students' abilities to determine the main idea and monitor fluency as well.
The fifth station that the kids completed required the kids to use nonfiction books. I have always struggled to find nonfiction books that were grade appropriate for finding main idea and supporting details. After searching the local library high and low, I stumbled upon some FAB-U-LOUS books by Gail Gibbons. These books were perfect because I was able to find a variety of books with different reading levels to differentiate for my students' needs. Also, a few of the more difficult books, had multiple main ideas and supporting details. This allowed me to challenge my higher students and address the standard for fifth grade (determine two or more main ideas of a text and explain how they are supported by key details).
The students completed a graphic organizer to go along with their book. I am sharing this file of graphic organizers for you to use with your students. You may click here to download. I required my students to read one book and complete the graphic organizer, but the kids loved this station so much, a lot of them read multiple books. Yes, I am DEAD serious! After surveying the kids after the learning stations at the end of the week, the students told me that this station was their favorite (which really shocked me). They said they liked reading the nonfiction books because they enjoyed the topics.
Here are some examples of completed graphic organizers. I was SO proud of how well the kids did with this station.
I had five learning stations for identifying main idea and supporting details that the students completed. The students completed the learning stations in whatever order they wanted to allow for students to have a little choice. These learning stations took several days to complete, so they worked at their own pace with a partner.
One station that the students completed was a Main Idea- Jungle Safari Game that I purchased from Edupress. I have several of these games and the kids love them!
Another learning station that the kids really liked was the Main Idea in a Bag station from The Brown Bag Teacher. The kids loved these because they incorporated interesting Science and Social Studies topics. There are ten different bags for the students to choose from, but I only required the students to complete graphic organizers for four of the bags. This gave the students opportunities to choose the topics that interested them.
Of course, these stations would never be complete without task cards. There were actually two learning stations that consisted of task cards. I used Rachel Lynette's Main Idea and Supporting Details task cards. I love these because Rachel offers the QR codes with answers for these. The kids used a QR code app for the i-Pad to get immediate feedback without me having to grade anything. This makes them easy-peasy!
The other set of practice cards that the kids used were from Edupress. I actually did this station with each student individually. The students chose four task cards and read each one orally for me. This gave me the opportunity to assess the students' abilities to determine the main idea and monitor fluency as well.
The fifth station that the kids completed required the kids to use nonfiction books. I have always struggled to find nonfiction books that were grade appropriate for finding main idea and supporting details. After searching the local library high and low, I stumbled upon some FAB-U-LOUS books by Gail Gibbons. These books were perfect because I was able to find a variety of books with different reading levels to differentiate for my students' needs. Also, a few of the more difficult books, had multiple main ideas and supporting details. This allowed me to challenge my higher students and address the standard for fifth grade (determine two or more main ideas of a text and explain how they are supported by key details).
The Gail Gibbons books that I used for the stations are:
Apples (AR Reading Level- 4.0)
Beavers (AR Reading Level- 4.7)
Galaxies, Galaxies! (AR Reading Level- 5.7)
It's Raining! (AR Reading Level- 4.1)
Ice Cream: The Full Scoop (AR Reading Level- 4.4)
My Soccer Book (AR Reading Level- 3.0)
My Baseball Book (AR Reading Level- 2.9)
My Basketball Book (AR Reading Level- 3.2)
My Football Book (AR Reading Level- 3.2)
I hope that while you are searching for ideas and activities for teaching main idea and supporting details, you will find something here to ease your planning.
Have a great week!
Sunday, September 14, 2014
Theme and Main Idea
Many of you have asked what trade books and materials I use to teach my mini-lessons. I am trying very hard to blog once a week and share with you some of the books that I use in my classroom. This week, we continued our study of finding the theme of a story. For mini-lessons, I used the following books:
Those Shoes by Maribeth Boelts and Spaghetti in a Hot Dog Bun by Maria Dismondy. The kids really enjoyed both of these books because they both had a strong message. These books were great for comparing as well because the themes in both books are similar.
Throughout the week, the students read a variety of picture books in work centers to practice finding the theme of a story. I love to use books my Patricia Polacco and Eve Bunting. Some of the books that my kids used were:
Dandelions by Eve Bunting
A Day's Work by Eve Bunting
The Memory String by Eve Bunting
The Junkyard Wonders by Patricia Polacco
Three Hens and a Peacock by Lester Laminack
Mr. Peabody's Apples by Madonna
Thank you, Mr. Falker by Patricia Polacco
Chrysanthemum by Kevin Henkes
Chicken Sunday by Patricia Polacco
Brave Irene by William Steig
My students listened to the stories Brave Irene and Thank you, Mr. Falker on the i-Pads from Storyline Online.
The students used the graphic organizer that matches my interactive notebook page for finding the theme. If you would like a copy of this graphic organizer, you can download it for free here or by clicking on the picture.
Also, I introduced the corresponding nonfiction standard- finding the main idea. First, I introduced this by using Deb Hanson's Main Idea Powerpoint. My kids love her power points!
We also completed our interactive notebook page for finding the main idea. As an added resource, I created this THIEVES acronym sheet that also gives students clues to help them find the main idea of a nonfiction passage. You can download it here.
In the past, teaching theme and main idea have proven to be very tricky and the students often confuse the two concepts. I am thankful to my sweet friend, Mary, from Teaching with a Mountain View because she has some wonderful resources that I used this week. They certainly helped my students distinguish between the two. Mary has a great blog post that you can read about Main Idea Vs. Theme. My students created a T-chart in their notebooks, used her theme vs. main idea sort (freebie) on her blog, and the task cards she has available in her store.
Next week, we will continue to work on identifying the main idea in nonfiction texts. I have some stations prepared to implement. I will share those next week. :)
Have a great week!!!!!
Saturday, September 6, 2014
An introduction to THEME using song lyrics
This week, I introduced finding the theme of a piece of literature. For the hook/introduction, I used one of my favorite songs, Am I Wrong by Nico and Vinz. If you haven't listened to the lyrics of this song, they are pretty powerful.
I began by giving my students the lyrics for the song. (I can't share the handout that I gave my students due to copyright laws, but you can easily Google the lyrics.) I read the lyrics aloud, like the song was a poem. It didn't take long before there were whispers. The kids recognized the song. I actually heard one student say, "Do you think she knows this is a song and not a poem?" :)
Then, I had the students fold the handout in half. On the back of their lyrics page, I had them write what they thought the "poem" meant using evidence from the text. The students were then asked to discuss their thoughts and ideas with their assigned talk partner. This got them up and moving.
Once the students returned to their seats, I told the students that we were going to watch the video for the song. At this point, I wanted the students to use the visual, as well as the text, to determine what the song meant.
After watching the video, the kids used the other half of their paper to again write what they thought the message of the song is. Some just confirmed what they had originally thought, others changed their entire thinking. The students went back to their talk partners and grouped themselves with another set of talk partners to make a group of four. The students discussed what they thought the song meant. Before watching the video, some kids actually thought the song was about a boyfriend/girlfriend relationship.
We came back together whole class and discussed the message of the song. Some of the messages that the kids took away were:
* Work hard to achieve your goals
* Be yourself and don't let others tell you who you are
* It's okay to be different-believe in yourself
* The sky is the limit-chase your dreams
* If you can dream it, it can happen
After this, I showed the kids this video in which the artists discuss what events had happened to inspire this song.
This led to a discussion that songs, books, etc. may have different meanings to people because we all have different life experiences and backgrounds (schema).
From this point, I introduced the word THEME to the students and explained how the theme of a story, poem, or drama is the message the author wants you to take away from the piece of literature.
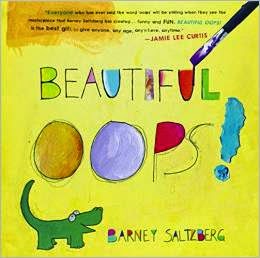
Throughout the week, we did several activities to practice finding the theme of a story. For my mini-lessons, I used two really AWESOME books. Rotten Teeth by Laura Simms and Beautiful Oops! by Barney Saltzberg. Beautiful Oops! is a very simple book, but it is a great one because it teaches the kids that it's okay to make mistakes and sometimes those mistakes can be turned into something beautiful.
During small group or partner practice, the students created their interactive notebook page. They added some resource pages from my Finding the Theme: Mission Possible pack to use as a resource while completing task cards (I had to shrink the resource pages to fit). I used task cards from Deb Hanson and Rachel Lynette for my partner stations. They also completed a Deb's Theme-Filled Cupcake Craftivity in their notebooks as well. I had to shrink these down to make them fit, as well.
Interactive notebook activities:
Next week, I plan to continue working on theme because it is SUCH a difficult concept, but adding the nonfiction standard of main idea. I try to teach both of these standards early in the year because they are the two standards that give my students the most trouble. We practice finding the theme in literature and the main idea in informational text all year long.
I'll be back next week with more ideas and tricks for teaching theme and main idea.
Enjoy your weekend! :)
Saturday, August 30, 2014
Making Inferences Using Mentor Texts
This week, we continued working on making inferences. All of the lessons and activities prior to this week, were to build our understanding of making inferences. This week, we took our understanding to the next level and applied it mentor texts.
I started the week out using the book, Miss Nelson is Missing by Harry G. Allard. With this book, "I" modeled and "We" practiced using the text to make inferences. I had the students complete this handout that I created to use what the text says to make inferences about Miss Nelson and Miss Viola Swamp. The kids really enjoyed the book and it was an easy text to use to model the process.
I found the wonderful text dependent questions from the website, Achieve the Core. I took the questions that I found and retyped them, so the students would have room to respond. You can download my copy of the questions here. Even though I don't use a basal for reading, I have a handful of old textbooks, and they happened to have The Stranger in it. I was able to provide each pair a copy of the story to answer the questions. It took the kids a couple of days to work through the story.
As I mentioned before, the kids LOVED this story! One of my students told me that he thought had a difficult time going to sleep the day we read this book in class. He said it was KILLING him not to be able to figure out the story. I was SO excited to hear that the kids were thinking about reading class at home. :) In fact, my kids have asked that I find more books like this one for them to read. They really enjoyed trying to interpret the story. So, that is my mission right now......finding more books like this one.
If you have mentor texts that you love to use for teaching inferences, I would love to know the titles. Also, if you have any recommendations for similar titles to The Stranger, please share the titles. My students would be forever grateful! :)
I started the week out using the book, Miss Nelson is Missing by Harry G. Allard. With this book, "I" modeled and "We" practiced using the text to make inferences. I had the students complete this handout that I created to use what the text says to make inferences about Miss Nelson and Miss Viola Swamp. The kids really enjoyed the book and it was an easy text to use to model the process.
Then, we used the book, The Stranger by Chris Van Allsburg. This is the first year I have ever used this book to teach making inferences. Let me just say, if you haven't used this book as a mentor text for this skill, YOU NEED TO ADD IT to your lesson plans immediately! My kids fell in love with this book and were DYING to know who "the stranger" was. I read the story as a read aloud. Then, I put the students with "talk partners" to complete text dependent questions that really required the kids to analyze the text.
As I mentioned before, the kids LOVED this story! One of my students told me that he thought had a difficult time going to sleep the day we read this book in class. He said it was KILLING him not to be able to figure out the story. I was SO excited to hear that the kids were thinking about reading class at home. :) In fact, my kids have asked that I find more books like this one for them to read. They really enjoyed trying to interpret the story. So, that is my mission right now......finding more books like this one.
If you have mentor texts that you love to use for teaching inferences, I would love to know the titles. Also, if you have any recommendations for similar titles to The Stranger, please share the titles. My students would be forever grateful! :)
Sunday, August 24, 2014
Making Inferences and Freebies
First, have you noticed? Teaching with Blonde Ambition got a much needed facelift! Thanks to Christi Fultz for a wonderful blog design! She TOTALLY nailed it and it depicts my personality perfectly!!! :)
So many teachers have asked me to blog about my lessons and how I teach various skills. Also, teachers have asked what order I teach the standards. Well, I am going to answer a few of those questions today. First, I have my pacing guide that I use for teaching ELA that I am going to share with you. This is MY pacing guide and the order that I teach the Common Core Standards. I emphasize the word MY because this is strictly the order that I have chosen to teach the standards. I do a lot of spiral teaching, but this gives you my plan and when I introduce each standard. Once I have taught a standard, I continue to integrate the standards throughout the school year. Click here to download my pacing guide.
So, this past week, I started teaching how to make inferences. I am going to give you a peek at what our week looked like. Here are some of the activities we did in class last week to learn about inferences.
To introduce inferences, I began with a concrete definition for making inferences. The first activity I started with was "Making Trashy Inferences." This was not my original idea. My teammate found it online somewhere and told me about it. But, basically as a class, I modeled how to make inferences by using my neighbors' trash (totally made up). I told the kids that I have new neighbors in my subdivision that I haven't had the opportunity to meet. I explained that my English mastiff likes to bring their trash to my house, so I have collected the trash and brought it in for them to see. I told them that I hoped they could help me learn more about my neighbors by using the clues/evidence plus their background knowledge to make inferences about them. I showed the kids a trash bag full of various items like a baby clothes hanger, birthday candles, a Wal-mart bag, receipts, etc. I pulled the items out of the trash bag and we discussed as a class what they all might mean about my neighbors. They filled out a handout that I created while we did this activity. After it was over, I told this kids that I wanted them to be "trashy" readers......snoop through the clues in the text to make inferences about what they read. Side note: The kids really believed my story about the neighbors. In fact, they asked if I would go introduce myself so I could find out if their inferences are correct. LOL!!! It was really painful to tell the kids that I did have new neighbors, but the trash wasn't theirs. :)
After this activity, I used an activity from Babbling Abby. I had my students work more independently to make inferences about me, their teacher, using items from my purse. We did this whole group, but the kids made their inferences independently. I held up an item and they completed their inference chart. Then, I had the students get with a partner and discuss the inferences that they made. We came back together whole group and discussed them. If you would like to use these handouts, you can download them here.
The next day, I used Deb Hanson's Making Inferences Powerpoint lesson, as my mini-lesson.
Also, I used this adorable video to teach the kids a song to help them remember how to make an inference while reading. It's to the tune of Call Me, Maybe. The kids were really liked it!
After we learned about making inferences, we created our interactive notebook page for my Interactive Notebook file.
Then, the kids worked in learning stations to play games and practice making inferences using small amounts of text. Here are some of the resources I used for those learning stations.
I used task cards from Rachel Lynette and Teaching with a Mountain View.
This board game came from Edupress.
This adorable board game came from Fun in 5th Grade. I love this game because the cards have QR codes on them, so the kids can use the scanner on the i-Pad to check their answers. They LOVE this!!!!!
For some more concrete practice, I used inference activities from Lindsay Flood- Whose Pocket Is Whose?, The Magician that Made a Mistake from Cara Taylor, Who Wears This Shoe? inferencing activity from Fourth and Ten, and Have Your Cake and Inference Too! activity from Christina Bainbridge.
Okay, so this is basically my week in a nutshell. Everything is still slow moving as we learn classroom procedures and expectations. We worked on reading stamina as well.
Next week, I will share with you how we take this skill from concrete and apply it to reading literature and informational text. :) I will also be introducing theme and main idea. Stay tuned!
Have a fabulous week!!!!
So many teachers have asked me to blog about my lessons and how I teach various skills. Also, teachers have asked what order I teach the standards. Well, I am going to answer a few of those questions today. First, I have my pacing guide that I use for teaching ELA that I am going to share with you. This is MY pacing guide and the order that I teach the Common Core Standards. I emphasize the word MY because this is strictly the order that I have chosen to teach the standards. I do a lot of spiral teaching, but this gives you my plan and when I introduce each standard. Once I have taught a standard, I continue to integrate the standards throughout the school year. Click here to download my pacing guide.
So, this past week, I started teaching how to make inferences. I am going to give you a peek at what our week looked like. Here are some of the activities we did in class last week to learn about inferences.
To introduce inferences, I began with a concrete definition for making inferences. The first activity I started with was "Making Trashy Inferences." This was not my original idea. My teammate found it online somewhere and told me about it. But, basically as a class, I modeled how to make inferences by using my neighbors' trash (totally made up). I told the kids that I have new neighbors in my subdivision that I haven't had the opportunity to meet. I explained that my English mastiff likes to bring their trash to my house, so I have collected the trash and brought it in for them to see. I told them that I hoped they could help me learn more about my neighbors by using the clues/evidence plus their background knowledge to make inferences about them. I showed the kids a trash bag full of various items like a baby clothes hanger, birthday candles, a Wal-mart bag, receipts, etc. I pulled the items out of the trash bag and we discussed as a class what they all might mean about my neighbors. They filled out a handout that I created while we did this activity. After it was over, I told this kids that I wanted them to be "trashy" readers......snoop through the clues in the text to make inferences about what they read. Side note: The kids really believed my story about the neighbors. In fact, they asked if I would go introduce myself so I could find out if their inferences are correct. LOL!!! It was really painful to tell the kids that I did have new neighbors, but the trash wasn't theirs. :)
The next day, I used Deb Hanson's Making Inferences Powerpoint lesson, as my mini-lesson.
Also, I used this adorable video to teach the kids a song to help them remember how to make an inference while reading. It's to the tune of Call Me, Maybe. The kids were really liked it!
After we learned about making inferences, we created our interactive notebook page for my Interactive Notebook file.
Then, the kids worked in learning stations to play games and practice making inferences using small amounts of text. Here are some of the resources I used for those learning stations.
I used task cards from Rachel Lynette and Teaching with a Mountain View.
This board game came from Edupress.
This adorable board game came from Fun in 5th Grade. I love this game because the cards have QR codes on them, so the kids can use the scanner on the i-Pad to check their answers. They LOVE this!!!!!
For some more concrete practice, I used inference activities from Lindsay Flood- Whose Pocket Is Whose?, The Magician that Made a Mistake from Cara Taylor, Who Wears This Shoe? inferencing activity from Fourth and Ten, and Have Your Cake and Inference Too! activity from Christina Bainbridge.
Okay, so this is basically my week in a nutshell. Everything is still slow moving as we learn classroom procedures and expectations. We worked on reading stamina as well.
Next week, I will share with you how we take this skill from concrete and apply it to reading literature and informational text. :) I will also be introducing theme and main idea. Stay tuned!
Have a fabulous week!!!!